|
|

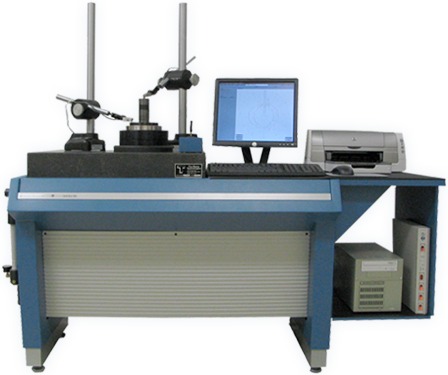
A very rigid console with a large surface plate and gage stand permits increased versatility, accuracy, and capacity over the portable bench type systems. This is the ideal system for fixed inspection, production, or metrology locations. Special models are available with weight capacities up to 1000 pounds; spindle accuracies to ±1 millionth of an inch, and full mini-computer measurement assist and data reduction capabilities.
| Measures and Charts | Out-of-round (TIR), concentricity, coaxiality, squareness, straightness of axis |
| Measurement Datum | Air Bearing |
| Accuracy - Radial or Axial | (Std) ±2.5 µin (0.063 micron) |
| Departure from Least Squares | ±1.5 µin (0.038 micron) (optional) |
| Circle at Work Table Height | ±1.0 µin (0.025 micron) (optional) |
| Coning | 1 µin/in (0.025 micron/cm) |
| Air Consumption | 0.15 scfm |
| Rotational Speed | 1, 2 or 4 RPM |
| Capacity (Balanced Load) | 200 lbs. (90 kg) Air Spindle Only |
| Part Swing | 21 inch (533 mm) |
| Part Height Overall (Gage Reach) | 24 inch (610 mm) above work table |
| Console to top of spindle with tilt base |
L 65" (1650 mm) W 27" (686 mm) H 30" (762 mm) |
| Surface Plate | LWH 27" X 20" X 4" |
| Weight | 380 lbs. (173 kg) |
| Power |
115V 60Hz 120W Other voltages and frequencies optional |

The Precision Devices, Inc. Roundness software measures the out-of-roundness of machined cylindrical parts as set forth in the Measurement of Out-of-Roundness standard (ANSI B89.3.1-1972). It also enables the measurement of other form-related characteristics of a part such as the following:
The Roundness software is a 32-bit Windows XP/NT application that supports multiple documents. A single document can store up to 8 traces taken at different locations on the same part.
A document window is broken into two views: a graph view and a text view. The graph view depicts either a polar or a strip chart; multiple traces can be overlaid on the same chart to allow inspection of their similarities and differences. The text view contains a text summary of the various settings and computed parameters for all traces within a document.
Traces can be acquired, overwritten, renamed, and deleted at will. They can also be modified through various techniques. High-frequency surface roughness unrelated to a part's overall form can be filtered out. Faults due to part mis-centering can be masked. Gaps present in interrupted surfaces can be "patched".
For the determination of out-of-roundness, circles can be fitted to traces by one of four methods (minimum zone, least squares, maximum inscribed, and minimum circumscribed). The choice of method depends upon the type of trace (e.g. inner diameter vs. outer diameter) and other factors.
Frequency-domain analysis of trace data can be undertaken to determine lobing effects in parts.
Various aids are present in the software to simplify the acquisition of traces. Step-by-step "wizards" can be used for tracer calibration and part centering and leveling. Both the polarity and the zero position of the tracer can be adjusted prior to a trace, while the detail level of tracer readings can be modified at any time through a zoom capability. Dual tracers can be configured for use, although only one at a time can be used for collecting data.
The spindle operates at two velocities and can be controlled by a joystick. The fast velocity is used when the spindle is under joystick control. The slow velocity is used during a trace and ranges from 1 to 4 RPM. Spindle rotation occurs in the clockwise direction during trace acquisition, meaning that traces are taken counterclockwise around a part. Zero degrees in a trace is defined as the position on the part that the tracer touches when the spindle is at home position.
The colors of the background, chart grid lines, traces, circles, text, etc., can be modified independently according to taste for both screen display and hard copy.
As an application that supports ActiveX Automation, the Roundness software can be "driven" by user-created scripts for the purpose of automating various repetitive tasks. Such tasks include the exporting of computed parameters to other Automation-aware applications such as Microsoft Excel after every trace for SPC and other purposes.